project summary
- Java GUI
- VB.NET GUI
- FTDI 245 / D2XX
- USB Relay Board
- Control On/Off of each relay
- 32 and 64 bit Windows systems
System Components
- Netbeans (Java IDE)
- Visual Studio.NET 2015 Community (VB IDE)
- System dll
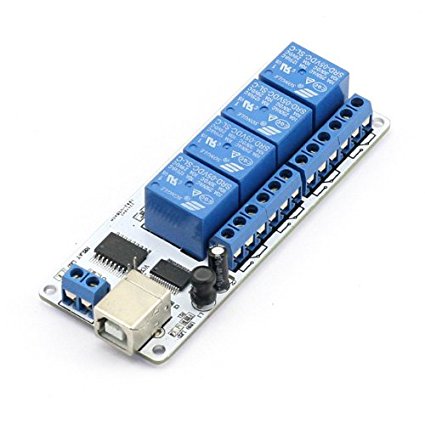
- SainSmart 4 Relay USB Board
skills
- Java Programming
- VB.NET Programming
- GUI Design
- Object Oriented Principles
- Software and Hardware Troubleshooting
About the Project

I needed to do some automated testing that required cycling power to some boards at various times throughout a test procedure. I didn’t want to mess with IP addresses, and many of the computers that might run this software do not have native serial ports, so USB really fit the bill as long as I could control the relays from within the test GUI.
So I picked up a 4 relay board from Amazon. It is made (or at least distributed) by a company called SainSmart. The reviews on the board were split with some people saying that the board worked great and others complaining that they couldn’t get it to work. Nearly all of the reviews agreed that the documentation was not great and it took quite a bit of effort to find the right combination of steps to get the board running. Well, I agree. And to that end, I am posting a java application I wrote, complete with source code, to control this board.

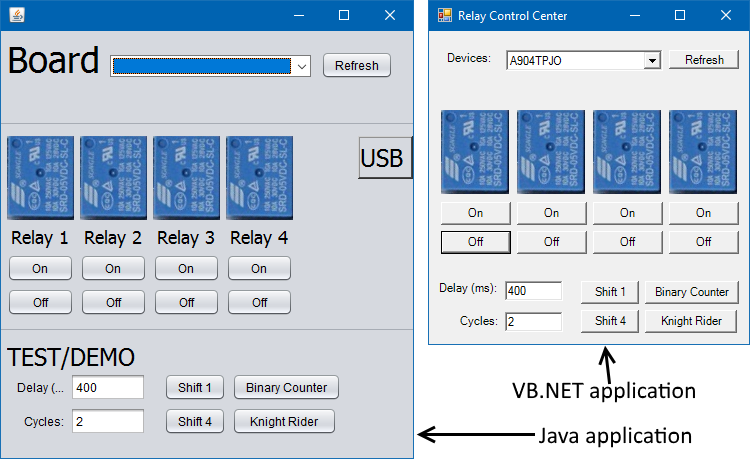
The application could probably be used on the first 4 relays of their 8 relay model, and of course it can be expanded to handle all 8. As it is, you can turn on and off each relay independently, and I added a few fun test modes that sequence the relays differently.
The Java application was written using jdk1.8, so I believe that means you need to have Java 8 installed on your machine to run it. The Java GUI itself should be cross platform (a benefit of Java), but the communication with the relay board’s FTDI 245 chip relies on a shared library that communicates with an FTDI D2XX device. I have only used this application on Windows, which requires that the shared library (JD2XX.dll) reside in your typical system’s dll folder. On many Windows machines, that path is C:\Windows\System32. Don’t let the System32 name fool you – on a 64 bit machine, that System32 folder still holds the 64 bit dll’s. I am including in this downloadable package the 32 bit and the 64 bit dll. Choose the dll that matches your system and put it in that System32 folder.
The VB.NET application also requires that a D2XX driver be installed on the windows machine. This can be downloaded from FTDI’s website. Similar to the J2DXX.dll, the D2XX.dll will be installed into the C:\Windows\System32 folder. The VB application was a bit more quick and dirty than the Java application, so don’t expect the greatest coding practices. This was a quick exercise to give more people more options for examples.
In summary, to use this application as-is, you should
- be running a Windows operating system
- have Java 8 runtime installed (for the Java application only)
- put the appropriate dll (included for the Java application, download from FTDI for the VB.NET application) in the System32 folder
- have a SainSmart relay board or any similar device that uses an FTDI 245 (or similar) in bitbang mode
…which leads me to a quick explanation of how the code works with the FTDI 245 chip. The 245 is a USB to FIFO chip, meaning that it is a USB peripheral that has 8 digital outputs. It can be controlled by a number of methods, but the easiest mode is known as bitbang mode. In this mode, you simply send a number from 0 to 15 (for 4 relays) or 0 to 255 (for 8 relays). The least significant bit of that number commands the state of the first digital output (0=off, 1=on), the second bit of that number commands the state of the second digital output, and so on. So when you start up this application, it searches the system for any D2XX devices. If there is only one, it is automatically selected and opened for manipulation within the system. From that point, you simply click the buttons on the form to send the numeric commands to the board.
Credits
Java Application
- I used jd2xx from Pablo Bleyer, found here, as a start. This provided me with the dll wrapper for java as well as the 32 bit JD2XX.dll.
- I needed a 64 bit dll, so I grabbed that from murkle’s post on StackOverflow. (direct link to dll)
VB.NET Application
I used Example 4 on FTDI’s VB examples webpage as a starting point. In fact, my project name is identical because I just modified their general D2XX example to be specific to bit banging the FTDI 245 chip.
Downloads
These downloads come without warranty or support.
Java Application
- RelayBoard_2017-06-03: My Netbeans project (all source) as well as the DLL’s (inside the systemDLL folder).
- RelayBoard_jarAndDll_2017-06-03: Just the executable jar file and the DLL’s for those of you who do not want source code.
VB.NET Application
- ftdi_vb_net_projectMy VB.NET 2015 Community project
- D2XXUnit_NET_exeOnlyThe exe only. To my knowledge, this has only been run on my machine, which is a 64 bit Windows 10 machine.
Final Note on Troubleshooting
If you run the jar file and nothing happens (the GUI doesn’t even show up), there is probably a problem with the DLL. You may have failed to copy it to the correct system directory. I recommend downloading Netbeans and the source code to try running the project with more descriptive output.
If you are running the application from within Netbeans, you may get a more useful error:
This also means that the dll known as JD2XX is not in the correct system directory.


